Installation of Xilinx ISE on Debian Linux, Fedora
Before the magic begins..
The Xilinx ISE is a powerful design suite for FPGAs/CPLDs manufactured by Xilinx. It consist of several tools that give possibility to design, debug, simulate and program the FPGAs. Unfortunately the Xilinx ISE is officially supported only on the one linux OS, namely, Rad Hat. However it does not mean that the Xilinx ISE would not work on other linux platforms, but requires additional postinstallation. The modifications, that you should make to force the tools work, depend on your OS and could be not trivial at all. The only help are tips'n'tricks on numerous FPGA forums and personal blogs, and I want to thank all of their authors. After spending of days for complete postinstallation I believe in importance of writing the following tutorial to save time of people that want to design FPGAs under linux.First, I want to clarify software versions and installing path I have used. So take into account, that you could have something different:
| OS | Debian "Wheezy" 7.0.0 (64-bit) |
|---|---|
| ISE version | 14.6 System Edition |
| path | /opt/Xilinx/14.6/ISE_DS/ |
Installation
I will skip the description of installation procedure, because everything is simple there and anyway there is always am installation guide with nice step-to-step screenshots. The only thing that I want to point is that you should uncheck "Install cable drivers" and "Acquire or Manage a License Key" boxes because they will not help us anyway :)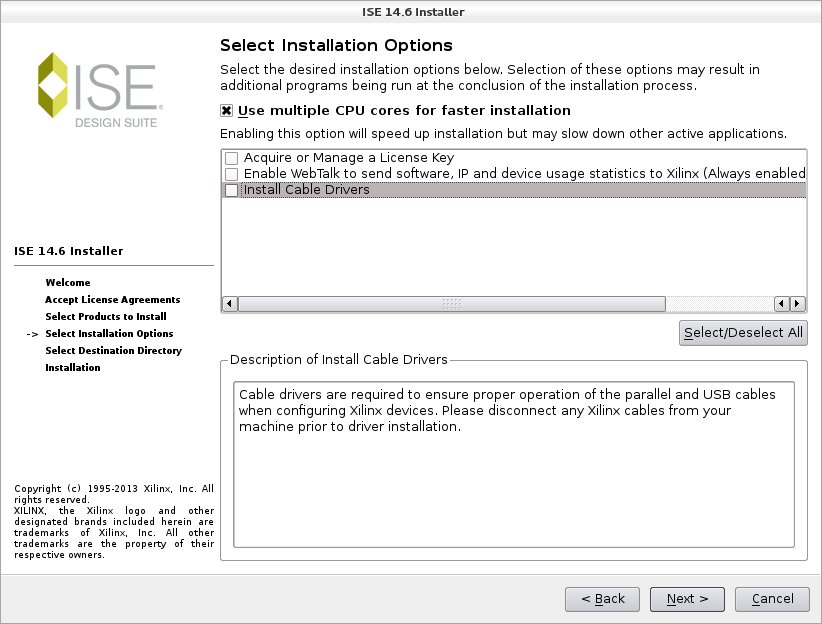
If you install ISE to write protected folder (like me), then make sure that .xinstall folder is not write protected
$ sudo chmod -R 777 /opt/Xilinx/14.6/ISE_DS/.xinstall/
After finishing of installation process don't hurry to launch ISE, you should first set the environment variables and launch settings64(32).sh script. There are different ways to manage it, I prefer it to be done during the boot of my OS by creating of the script in "/etc/profile.d"
$ sudo gedit /etc/profile.d/Xilinx.sh
and writing there
----------------------------------------------------------------------------------------------------------
#!/bin/sh
#export XILINXD_LICENSE_FILE=PORTNUMBER@HOSTNAME
export XILINXD_LICENSE_FILE="/opt/Xilinx/14.5/ISE_DS/Xilinx.lic"
ISE_DS_PATH=/opt/Xilinx/14.5/ISE_DS
export PATH=$PATH:$ISE_DS_PATH/ISE/bin/lin64:$ISE_DS_PATH/EDK/bin/lin64
export PATH=$PATH:$ISE_DS_PATH/ISE/sysgen/bin/lin64:$ISE_DS_PATH/ISE/sysgen/util
export PATH=$PATH:$ISE_DS_PATH/PlanAhead/bin
export XILINX=$ISE_DS_PATH/ISE/
export XILINX_DSP=$ISE_DS_PATH/ISE/
export XILINX_PLANAHEAD=$ISE_DS_PATH/PlanAhead/
source $ISE_DS_PATH/settings64.sh
---------------------------------------------------------------------------------------------------------
where one of variables sets the path to your license file or address of a server if you use float license. After next boot of your OS or restarting of profile.d scripts the ISE tools could be launched just by typing ise, impact, sysgen etc in a command line.
USB-JTAG cable drivers
If you try to write a firmware with use of Impact, he will not see your ISB-JTAG programmer and will give you an error where windrvr6 driver is mentioned, but Impact should use standard libusb driver. So, first install it$ sudo apt-get install fxload libusb-0.1-4 libusb-dev
[For fedora the installation file is libusb.x86_64 and libusb-devel.x86_64]
then copy the rules-file from ISE directory
$ sudo cp /opt/Xilinx/14.6/ISE_DS/ISE/bin/lin64/xusbdfwu.rules /etc/udev/rules.d/xusbdfwu.rules
You need to edit it a bit by removing BUS=="usb , replacing SYSFS by ATTRS and $TEMPNODE by $tempnode
$ sudo sed -i -e 's/TEMPNODE/tempnode/' -e 's/SYSFS/ATTRS/g' -e 's/BUS/SUBSYSTEMS/' /etc/udev/rules.d/xusbdfwu.rules
In this rules-file is written that if you plug the JTAG programmers with known VendorIDs and ProductIDs, then fxload will download proper firmwares from /usr/lib/ directory to programmers. Copy the usb firmware to the expected location
$ sudo cp /opt/Xilinx/14.6/ISE_DS/common/bin/lin64/xusb*.hex /usr/share
Create a link for the usb library, because Impact will search for libusb in /usr/lib/
$ sudo ln -s /usr/lib/x86_64-linux-gnu/libusb-0.1.so.4 /usr/lib/libusb.so
Restart udev and replug your programmer
$ sudo /etc/init.d/udev restart
If you use only ISE and Impact then the postinstallation is done for you and you can start design FPGAs. In next sections I will write about the changes you should make to work with other tools of the ISE suite.
ChipScope Analyzer
Analyzer uses bash features, however has #!/bin/sh which should be changed to #!/bin/bash$ sudo sed -i -e 's/#!\/bin\/sh/#!\/bin\/bash/' /opt/Xilinx/14.5/ISE_DS/ISE/bin/lin64/unwrapped/analyzer
System Generator
The same story with sysgen$ sudo sed -i -e 's/#!\/bin\/sh/#!\/bin\/bash/' /opt/Xilinx/14.5/ISE_DS/ISE/sysgen/util/sysgen
FPGA Editor
FPGA editor looks for libXm.so.3 library, so give it tom him$ sudo apt-get install libmotif4 libstdc++5
$ sudo ln -s /usr/lib/libXm.so.4.0.3 /usr/lib/libXm.so.3
libstdc++ library fix
libstdc++ libraries are included with ISE suite, but are too old for other software and it leads to versions' conflict, for example, when you work with ISim or some of ISE tools try to open internet links in browser. You should replace libstdc++.so files with links to up-to-date libraries:$ cd /opt/Xilinx/14.5/ISE_DS/common/lib/lin64
$ sudo sudo mv libstdc++.so libstdc++.so.bak
$ sudo sudo mv libstdc++.so.6 libstdc++.so.6.bak
$ sudo sudo mv libstdc++.so.6.0.8 libstdc++.so.6.0.8.bak
$ sudo ln -s /usr/lib/gcc/x86_64-linux-gnu/4.7/libstdc++.so libstdc++.so
$ sudo ln -s libstdc++.so libstdc++.so.6
$ sudo ln -s libstdc++.so libstdc++.so.6.0.8
XSDK
XSDK looks for the gmake executable, you should readdress it to make$ sudo ln -s /usr/bin/make /usr/bin/gmake
Bells and whistels
This improvement is not necessary, but makes ISE more user-friendly by adding of tools' icons to menu and associating of .ise, .xise, .ipf etc filetypes to corresponding executables. I have prepared all icons, MIME-files and menu entities, so you can download all of them. In the archive you can also find install-xilinx-icons.sh script of the following content#!/bin/sh
#
# Script that installs icons, menu entities and MIME-types for Xilinx ISE
#
echo "Copying icons to /usr/share/icons/"
sudo cp xilinx.svg ise.svg impact.svg chipscope.svg xps.svg planAhead.svg sysgen.svg /usr/share/icons/hicolor/scalable/apps/
echo "Adding items to main menu"
sudo cp xilinx.directory /usr/share/desktop-directories/
sudo cp xilinx.menu /etc/xdg/menus/applications-merged/
echo "Updating icons"
sudo xdg-icon-resource forceupdate
echo "Registering MIME types"
xdg-mime install ise-mime.xml
xdg-mime install impact-mime.xml
xdg-mime install chipscope-mime.xml
xdg-mime install xps-mime.xml
xdg-mime install planAhead-mime.xml
echo "Installing icons for filetypes"
xdg-icon-resource install --context mimetypes --size 48 ise.png application-x-ise
xdg-icon-resource install --context mimetypes --size 32 impact.png application-x-impact
xdg-icon-resource install --context mimetypes --size 48 chipscope.png application-x-chipscope
xdg-icon-resource install --context mimetypes --size 64 xps.png application-x-xps
xdg-icon-resource install --context mimetypes --size 64 planAhead.png application-x-planAhead
echo "Installing menu items"
xdg-desktop-menu install --novendor ise.desktop
xdg-desktop-menu install --novendor impact.desktop
xdg-desktop-menu install --novendor impact-ipf.desktop
xdg-desktop-menu install --novendor chipscope.desktop
xdg-desktop-menu install --novendor chipscope-cpj.desktop
xdg-desktop-menu install --novendor xps.desktop
xdg-desktop-menu install --novendor sysgen.desktop
xdg-desktop-menu install --novendor planAhead.desktop
echo "Done!"
This script will make all business with adding of icons to main menu and registering of MIME-types. Of course, you can modify it for your needs, this is just an example. Finally, some pics of how it will look like


Comments
Post a Comment