Writing your research paper in Latex: Useful commands and tips
2. Bibtex problem – Question mark instead of number for reference
To update you bibtex citations, select BibTex from Quick Build and compile, then select PDFLatex and compile twice to update the citation numbers in the PDF. Rebuilding it a few times replace the .aux and .bbl files that were made when you used before.
Common citation mistake , putting spaces between comma seprated bibtex keys:
\cite{zhao2003face,samal1992automatic,yang2002detecting} |
3. How to center cell contents of a LaTeX table whose columns have fixed widths?
Use
\usepackage{array} |
them this:
1
| \begin{tabular}{| >{\centering\arraybackslash}p{.5cm} | >{\centering\arraybackslash}p{8cm} |} |
4. Latex command reference
To find the latex command for different symbols click here and here.
5. Big Parenthesis in an Equation
replace ( with \left( and ) with \right), which automatically expand to fit the material between them. Note that every \left… requires a \right… (but the type of bracket may be different, i.e. \left(…\right] also works).
6. In-line equations
There are three essentially equivalent ways to code in LaTeX the same anti-derivative formula from calculus as an in-line equation. In the first case, mathematics mode is delimited by dollar signs.
This is an in-line $\int \frac{d\theta}{1+\theta^2} =
\tan^{-1}\theta+C$ equation.
In the next case, mathematics mode is delimited by the \( and \) pair.
This is an in-line \(\int\frac{d\theta} {1+\theta^2}= \tan^{-1} \theta+C\) equation. |
This is an in-line \begin{math}\int\frac {d\theta}{1+\theta^2} = \tan^{-1} \theta+ C\end{math} equation. |
7. Scale image to page width
Use \textwidth for the width of the text block, and \paperwidth if you want to fit it into the paper width. You could also use \linewidth if you want to fit the image within the line width, which may vary depending on the environment you’re in (for example, within a list like enumerate).
\begin{figure}[!htbp]\label{fig:1}\centering\includegraphics[width=\textwidth]{sample-faces.png}\caption{Sample images from (a) FERET, (b) Indian and (c) in-house database}\end{figure} |
use two ‘ signs instead of one ” sign, like this “quoted”.
9. Tables: How to span over variable number of cells
Use multicolumn. Example –
\begin{table}[!htbp]% table caption is above the table\caption{The recognition accuracy of different orientation featured Gabor phase representations for 200 subjects.}\label{tab:1} % Give a unique label% For LaTeX tables use\begin{tabular}{|>{\centering\arraybackslash}p{.25cm}|>{\centering\arraybackslash}p{8.25cm}|>{\centering\arraybackslash}p{1.5cm}|>{\centering\arraybackslash}p{.5cm}|>{\centering\arraybackslash}p{.5cm}|>{\centering\arraybackslash}p{.5cm}|}\hlineNo. & Description & Complexity & \multicolumn{3}{|c|}{Recognition Accuracy (\%)} \\\hline... |
Make your text block as big as possible. The simplest way to do that is using the geometry package:
\usepackage[text={16cm,24cm}]{geometry} |
Following code will set the space between floats (including caption) and the surrounding text to 0pt, which is stretchable by 2pt.
\setlength{\intextsep}{0pt plus 2pt} % default value 12pt plus 2pt minus 2pt, |
In short, the placement options means allowing placement at certain locations:
h means here: Place the figure in the text where the figure environment is written, if there is enough room left on the page
t means top: Place it at the top of a page.
b means bottom: Place it at the bottom of a page.
p means page: Place it on a page containing only floats, such as figures and tables.
! allows to ignore certain parameters of LaTeX for float placement, for example:
\topfraction: maximal portion of a page (or column resp., here and below), which is allowed to be used by floats at its top, default 0.7
\bottomfraction: maximal portion of a page, which is allowed to be used by floats at its bottom, default value 0.3
\textfraction: minimal portion of a page, which would be used by body text, default value 0.2
\floatpagefraction: minimal portion of a float page, which has to be filled by floats, default value 0.2. This avoids too much white space on float pages.
topnumber: maximal number of floats allowed at the top of a page, default 2
bottomnumber: maximal number of floats allowed at the bottom of a page, default 1
totalnumber: maximal number of floats allowed at whole page, default 3
This means, if you add !, the float will be placed if it fits onto the current page and if there aren’t further waiting float objects of the same type, ignoring predefined propotions of text and floats as above. Such floats are also called bang floats.
Fractions can be changed by \renewcommand, numbers are counters which can be changed by \setcounter, further there are lenghts for spacing before, after, and between floats. This gives an impression how LaTeX automatically takes care of sensible figure placement, which you could adjust yourself – or override by ! if meaningful.
These options can be combined, such as [!htbp]. Their order doesn’t matter, LaTeX itself attempts using allowed places in order h, t, b, p, even if [pbth] was used.
You should even consider combining as many options as sensible. If a figure cannot be placed, it blocks subsequent figures. This can be a reason why figures end up very late, as you noticed. Specifically, ensure that the figures are not too big to fit into the margins.
12. How do I order citations by appearance using BibTeX?
Use
\bibliographystyle{ieeetr} |
Use
\usepackage{amsmath} |
\begin{equation}\begin{aligned}H_{\mu,v,r}=(h_{\mu,v,r} (0),h_{\mu,v,r} (1),\dots,h_{\mu,v,r} (B-1) ) \\\mbox{where, } h_{\mu,v,r}(i)=\sum_{(x,y)\in R_r}\delta(LGBP_{\mu,v}(x,y)-i),i=0,1,\dots,B-1\end{aligned}\end{equation} |
Text can be embedded in displayed equations (in LaTeX) by using \mbox{embedded text}. For example,
\begin{equation}\begin{aligned}H_{\mu,v,r}=(h_{\mu,v,r} (0),h_{\mu,v,r} (1),\dots,h_{\mu,v,r} (B-1) ) \\\mbox{where, } h_{\mu,v,r}(i)=\sum_{(x,y)\in R_r}\delta(LGBP_{\mu,v}(x,y)-i),i=0,1,\dots,B-1\end{aligned}\end{equation} |
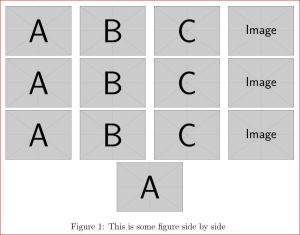
a) approach using tabular
\documentclass[a4paper,12pt]{article}\usepackage{graphicx}\usepackage{subcaption}\begin{document}\begin{figure}[htb]\centering \begin{tabular}{@{}cccc@{}} \includegraphics[width=.23\textwidth]{example-image-a} & \includegraphics[width=.23\textwidth]{example-image-b} & \includegraphics[width=.23\textwidth]{example-image-c} & \includegraphics[width=.23\textwidth]{example-image} \\ \includegraphics[width=.23\textwidth]{example-image-a} & \includegraphics[width=.23\textwidth]{example-image-b} & \includegraphics[width=.23\textwidth]{example-image-c} & \includegraphics[width=.23\textwidth]{example-image} \\ \includegraphics[width=.23\textwidth]{example-image-a} & \includegraphics[width=.23\textwidth]{example-image-b} & \includegraphics[width=.23\textwidth]{example-image-c} & \includegraphics[width=.23\textwidth]{example-image} \\ \multicolumn{4}{c}{\includegraphics[width=.23\textwidth]{example-image-a}} \end{tabular} \caption{This is some figure side by side}\end{figure}\end{document} |

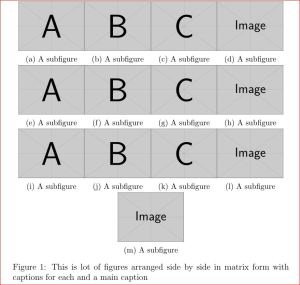
b) using subcaption that provides a subfigure command.
\documentclass[a4paper,12pt]{article}\usepackage{graphicx}\usepackage{subcaption}\begin{document}\begin{figure}[htb]\centering \begin{subfigure}[b]{.24\linewidth} \centering \includegraphics[width=.99\textwidth]{example-image-a} \caption{A subfigure}\label{fig:1a} \end{subfigure}% \begin{subfigure}[b]{.24\linewidth} \centering \includegraphics[width=.99\textwidth]{example-image-b} \caption{A subfigure}\label{fig:1b} \end{subfigure}% \begin{subfigure}[b]{.24\linewidth} \centering \includegraphics[width=.99\textwidth]{example-image-c} \caption{A subfigure}\label{fig:1c} \end{subfigure}% \begin{subfigure}[b]{.24\linewidth} \centering \includegraphics[width=.99\textwidth]{example-image} \caption{A subfigure}\label{fig:1d} \end{subfigure}\\% \begin{subfigure}[b]{.24\linewidth} \centering \includegraphics[width=.99\textwidth]{example-image-a} \caption{A subfigure}\label{fig:1e} \end{subfigure}% \begin{subfigure}[b]{.24\linewidth} \centering \includegraphics[width=.99\textwidth]{example-image-b} \caption{A subfigure}\label{fig:1f} \end{subfigure}% \begin{subfigure}[b]{.24\linewidth} \centering \includegraphics[width=.99\textwidth]{example-image-c} \caption{A subfigure}\label{fig:1g} \end{subfigure}% \begin{subfigure}[b]{.24\linewidth} \centering \includegraphics[width=.99\textwidth]{example-image} \caption{A subfigure}\label{fig:1h} \end{subfigure}\\% \begin{subfigure}[b]{.24\linewidth} \centering \includegraphics[width=.99\textwidth]{example-image-a} \caption{A subfigure}\label{fig:1i} \end{subfigure}% \begin{subfigure}[b]{.24\linewidth} \centering \includegraphics[width=.99\textwidth]{example-image-b} \caption{A subfigure}\label{fig:1j} \end{subfigure}% \begin{subfigure}[b]{.24\linewidth} \centering \includegraphics[width=.99\textwidth]{example-image-c} \caption{A subfigure}\label{fig:1k} \end{subfigure}% \begin{subfigure}[b]{.24\linewidth} \centering \includegraphics[width=.99\textwidth]{example-image} \caption{A subfigure}\label{fig:1l} \end{subfigure}\\% \begin{subfigure}[b]{.24\linewidth} \centering \includegraphics[width=.99\textwidth]{example-image} \caption{A subfigure}\label{fig:1m} \end{subfigure}% \caption{This is lot of figures arranged side by side in matrix form with captions for each and a main caption}\label{fig:1}\end{figure}\end{document} |

c) Using new subfig (subfigure is obsolete):
\documentclass[a4paper,12pt]{article}\usepackage{graphicx}\usepackage{subfig}\begin{document}\begin{figure}[htb]\centering \subfloat[A subfigure]{% \includegraphics[width=.24\textwidth]{example-image-a}}\hfill \subfloat[A subfigure]{% \includegraphics[width=.24\textwidth]{example-image-b}}\hfill \subfloat[A subfigure]{% \includegraphics[width=.24\textwidth]{example-image-c}}\hfill \subfloat[A subfigure]{% \includegraphics[width=.24\textwidth]{example-image}}\\ \subfloat[A subfigure]{% \includegraphics[width=.24\textwidth]{example-image-a}}\hfill \subfloat[A subfigure]{% \includegraphics[width=.24\textwidth]{example-image-b}}\hfill \subfloat[A subfigure]{% \includegraphics[width=.24\textwidth]{example-image-c}}\hfill \subfloat[A subfigure]{% \includegraphics[width=.24\textwidth]{example-image}}\\ \subfloat[A subfigure]{% \includegraphics[width=.24\textwidth]{example-image-a}}\hfill \subfloat[A subfigure]{% \includegraphics[width=.24\textwidth]{example-image-b}}\hfill \subfloat[A subfigure]{% \includegraphics[width=.24\textwidth]{example-image-c}}\hfill \subfloat[A subfigure]{% \includegraphics[width=.24\textwidth]{example-image}}\\ \subfloat[A subfigure]{% \includegraphics[width=.24\textwidth]{example-image}} \caption{This is lot of figures arranged side by side in matrix form with captions for each and a main caption}\label{fig:1}\end{figure}\end{document} |
Use
\vspace*{n * \baselineskip} % empty line |
Comments
Post a Comment